COLX Masternode Install Guide v2.0 (VPS+Linux)
[vc_row type=”in_container” full_screen_row_position=”middle” bg_color=”#f2f2f2″ scene_position=”center” text_color=”dark” text_align=”left” disable_element=”yes” overlay_strength=”0.3″ shape_divider_position=”bottom” shape_type=””][vc_column column_padding=”padding-3-percent” column_padding_position=”all” background_color_opacity=”1″ background_hover_color_opacity=”1″ font_color=”#3e3a3a” column_shadow=”none” column_border_radius=”none” width=”1/1″ tablet_text_alignment=”default” phone_text_alignment=”default” column_border_width=”none” column_border_style=”solid”][vc_column_text]
Set up COLX Masternode. Detail guide.
This manual will describe the installation of masternode on a VPS. Without a description of the purchase.
You have prepared the following data and programs.
Your data VPS:
1. Host (PUBLIC_ADDRESS)
2. Username (root)
3. Password
Programs:
1. COLX Wallet – download here: http://colossusxt.io/downloads-wallet/
2. FTP Client Win SCP (download for windows) or Filezilla (download for MAC OS)
3. Terminal Putty (download for windows) or app Terminal (include in Mac OS)
4. Notepad++ download
*** For MacOS
To start Terminal, go to your Mac’s Applications folder => click on the Utilities folder => then click on Terminal.
How to access a web server using the Terminal?
# ssh [email protected]
example: # ssh [email protected]
– when prompted for the password, enter your web server password.
– to quit the session, type “exit”.
Where are the Terminal settings/preferences?
On the top left of your screen, next to the Apple logo, click on Terminal => click on Preferences.
———————————————————————————————————————–
Setup configuration file
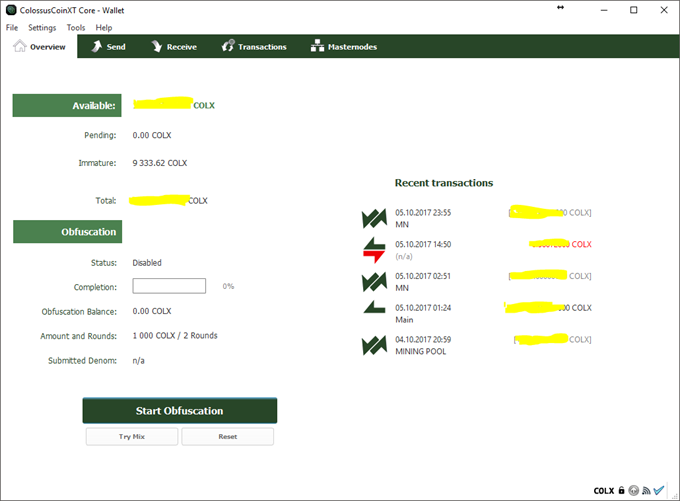
1. Open your wallet
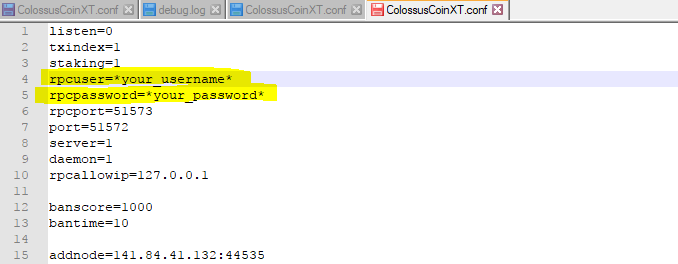
2. Click Tools-> Open Wallet Configurations and download my file configuration.

- Extract and copy all content ColossusCoinXT(upd_05.10.2017).zip and replace data:
rpcuser = *your_name*
rpcpassword = *your_password*(without special symbols)
Create masternode
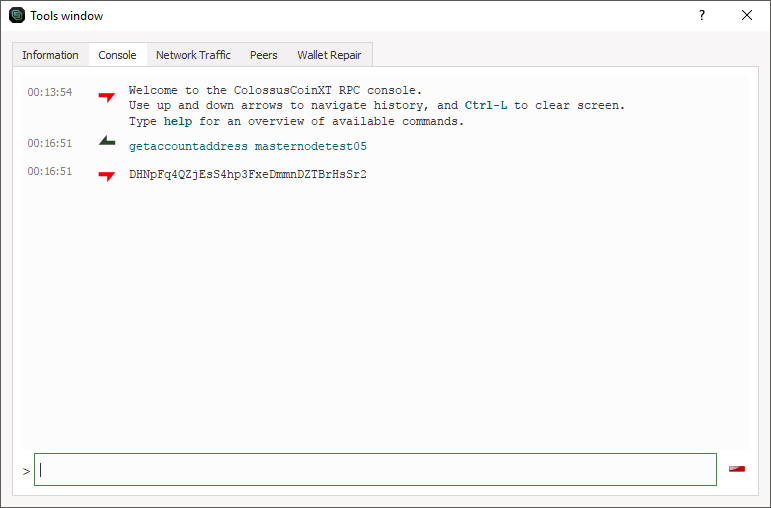
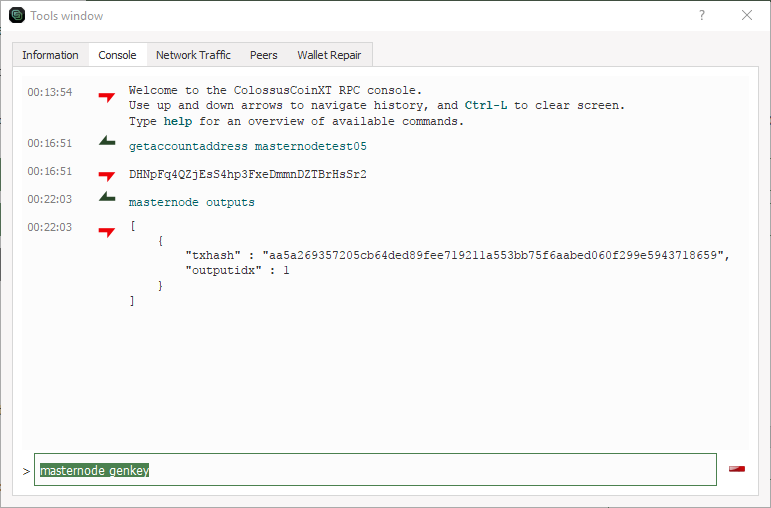
- Click Tools->Debug console

2. Create masternode account, use command getaccountaddress masternodetest05( or any label)
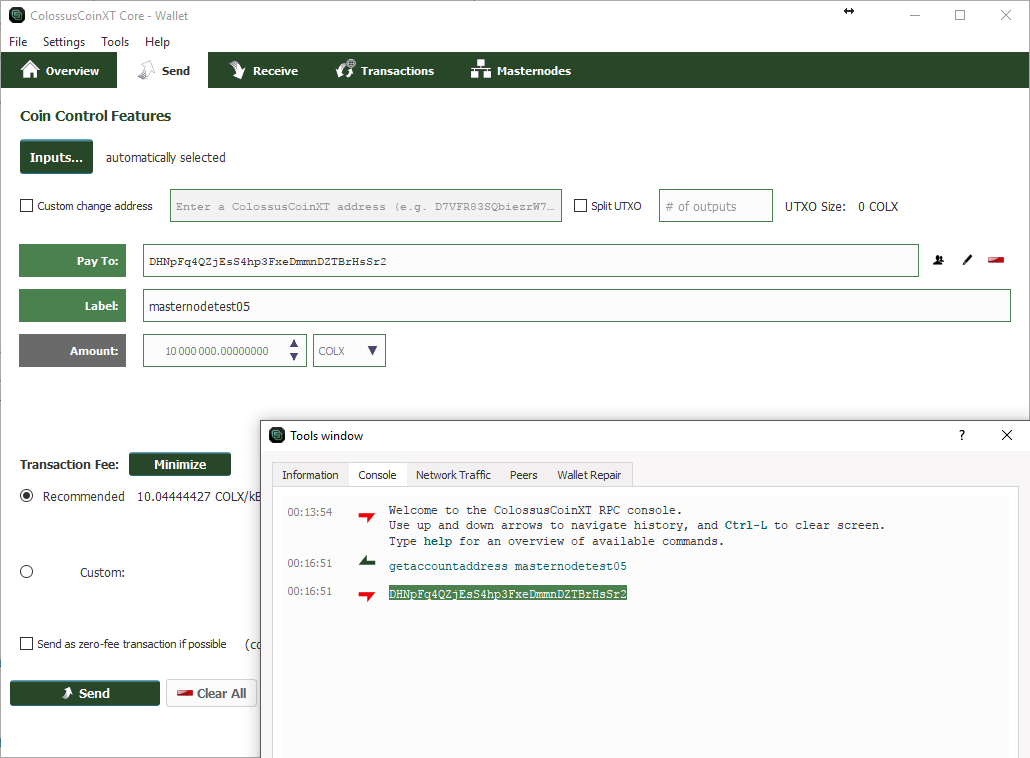
3. Click tab “SEND” and transfer 10 000 000 COLX (must be one 10,000,000 payment, not mulitple small amounts).
4. Return in debug console and check your payment
Copy and save txhash and outputidx (If the data is there it means the transaction was successful)

4. Create masternode private key. Command masternode genkey
Copy and save result.
5. Click Tools->Open Masternode Configuration File.
Example: masternodetest05 (space)your_vp _address:51572 (space) result_masternode genkey(space) txhash(space) outputidx
Add new string without symbol ‘#’

Restart wallet.
Setting the wallet on a remote LINUX server
- Open WinSCP or Filezilla on MAC OS
Input your server data

2. Download the required package to run the wallet on Linux VPS.
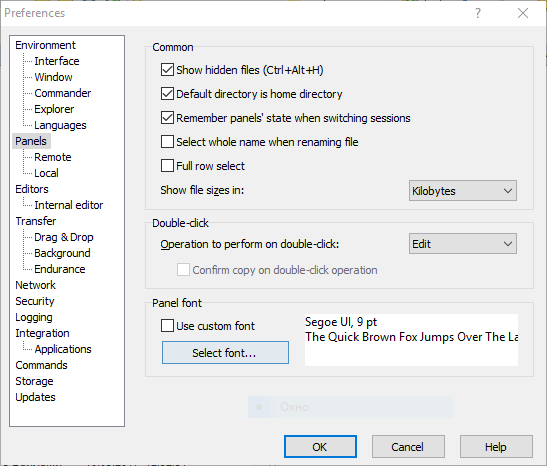
- Apply the settings to show hidden files
Options->Preferences->Panels-> Show hidden files or use hotkey Ctrl+Alt+H
- Go to folder root
- or use command line: cd ~

- Create folder .colx
- or use command line: mkdir .colx

- Go to .colx folder ,extract downloaded package for Linux and upload files in this folder.
- or use command line:
wget https://colxbot.cryptotrader24.com/upload/Package_for_MN_COLX_Linux_VPS.tar.gz
Extract: tar -xvf Package_for_MN_COLX_Linux_VPS.tar.gz in folder .colx

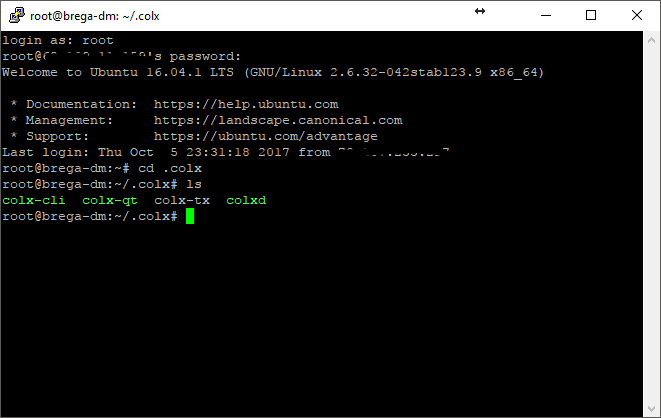
3. Open Putty or Terminal app for MacOS
- Input your data (hostname and label session) , click save and load.

- To log in as user root, enter and input your password


- Go to .colx folder, use command cd .colx and check wallet files use command ls
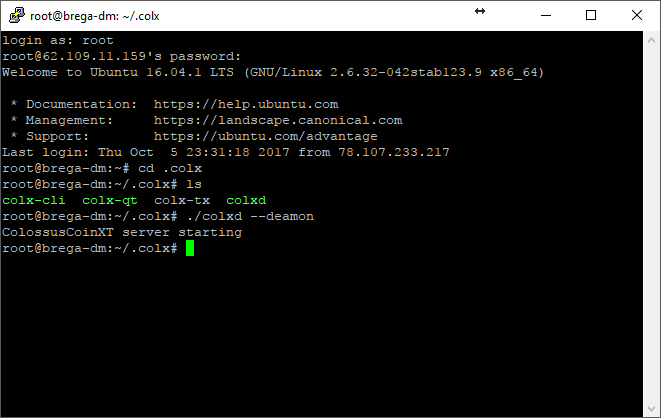
- Ok. Start wallet sync
- 1) You need to give permissions to run use command
– chmod +x colxd
– chmod +x colx-cli
- 2) Run deamon use command ./colxd –deamon
Wait 3-5 mins.
- Return in WinSCP and go to root folder.
- See create a new folder .ColossusCoinXT , enter in her

Download finished configuration file and replace sample data on yourself data and save on server modified file

Install masternode almost finished.
Turn on masternode
- Open Putty window and restart wallet on VPS
Stop: ./colx-cli stop
Start: ./colxd –deamon

2. Enter in local wallet debugc console and use command
masternode start-alias *name masternode*
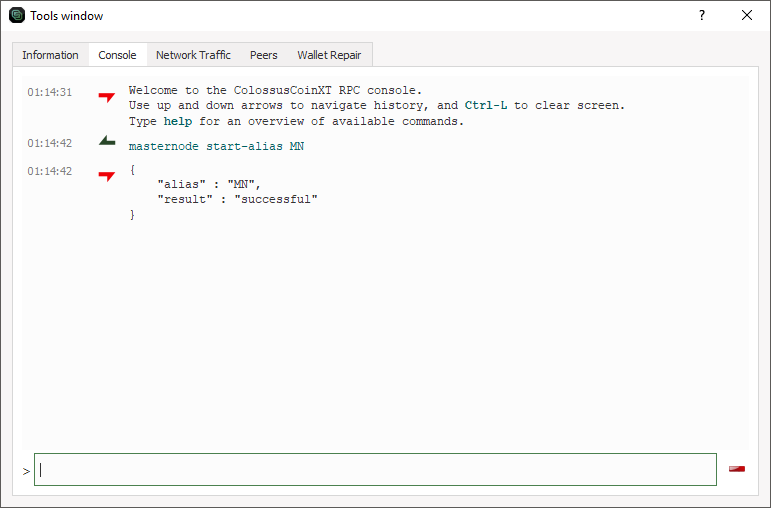
3. Check Tab – Masternodes. Status should be ENABLED

4. Check masternode on VPS. Go to putty window and use command
./colx-cli masternode status
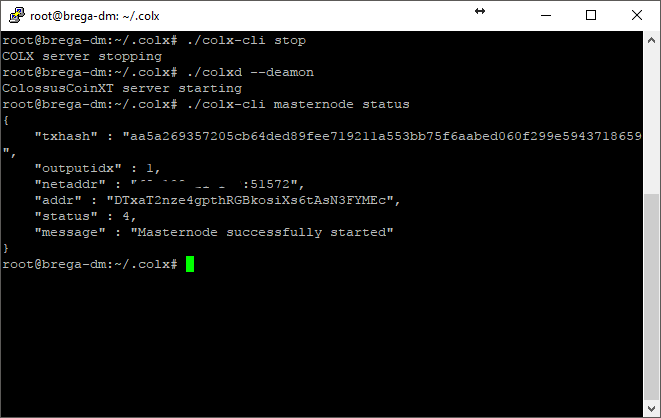
If you see “Masternode successfully started”
Congratulations! You could set masternode network COLX
Text wrote: @Cryptotrader24
Thanks for summary guide!
user Sussoloc46 https://colx.slack.com/team/U77EQ0V25
COLX Masternode installation guide (summary)
For security, you should create a hot/cold setup with TWO wallets:
– One wallet for the masternode (24/7, so either a VPS or a server in your home). This will be the masternode. IT WILL CONTAIN NO FUNDS!
– One wallet on your pc. THIS WILL CONTAIN THE FUNDS. You can use it to start the masternode server and then close this wallet.
First install the masternode wallet.
– It must use the default port: 51572 (and ususally 51573 for RPC);
– Write down the IP address, you’ll need it later;
– Open ports, NAT, firewall if you need to;
– Start it. On linux: colxd –deamon
– Synchonize the blockchain.
– Stop it to make adjustments later. On linux: colx-cli stop
– The masternode wallet will stay empty at all times!
Then install your PC wallet:
– This is just a regular install of the wallet with a GUI
– Synchonize the blockchain.
Transfer the funds to your PC wallet:
– Create a new receiving account (File, Receiving Addresses, New), call it ‘Masternode 01’ or whatever you like.
– Transfer exactly 10,000,000 to that account (must be one 10,000,000 payment, not mulitple small amounts).
Check your payment:
– In the console (Tools Menu, Debug Console), use ‘masternode outputs’.
– For valid 10,000,000 payments, it will give you a transaction_id and a transaction_index (usually 0 or 1).
– Copy/paste these values to textfile, you will need them later.
Create a unique number for your masternode:
– In the console, use ‘masternode genkey’
– Save it to the textfile, you will need it later.
Enter your masternode details in your PC wallet:
– Click Tools, Open Masternode Configuration File (or open masternodes.conf)
– On one line, enter: some name without spaces like
MN01 (space) masternode IP:port (space) generated_key (space) transaction_id (space) transaction_index
– Save the file and restart (I think)
Configure your masternode in ColossusCoinXT.conf:
– Add masternode=1
– Add masternodeprivkey={the key you generated}
– (re)start it. On linux: colx-cli stop / colxd –deamon
– The debug.log should say that the masternode is waiting to be started (from the PC wallet).
Activate the masternode from your PC wallet:
– Go to page ‘Masternodes’
– Click ‘update status’ to see
– Use any of the start buttons to register the masternode with the network.
– IF IT COMPLAINS ABOUT TXID: Use the console iinstead: ‘masternode start-alias MN01’
Check your masternode:
– The debug.log should say ‘Enabled!’.
– It will start Pinging the masternode system to keep its registration alive.
YOU CAN NOW CLOSE THE PC WALLET!
– If you open it, your masternode payments will appear (after block 10.080).
DOWNLOAD WALLET:
http://telegra.ph/Information-COLX-Wallets-09-24[/vc_column_text][/vc_column][/vc_row][vc_row type=”in_container” full_screen_row_position=”middle” scene_position=”center” text_color=”dark” text_align=”left” overlay_strength=”0.3″ shape_divider_position=”bottom”][vc_column column_padding=”no-extra-padding” column_padding_position=”all” background_color_opacity=”1″ background_hover_color_opacity=”1″ column_shadow=”none” column_border_radius=”none” width=”1/1″ tablet_text_alignment=”default” phone_text_alignment=”default” column_border_width=”none” column_border_style=”solid”][vc_raw_js]JTNDc2NyaXB0JTIwdHlwZSUzRCUyMnRleHQlMkZqYXZhc2NyaXB0JTIyJTNFJTIwJTBBJTBBd2luZG93LmxvY2F0aW9uJTIwJTNEJTIwJTIyaHR0cHMlM0ElMkYlMkZ3aWtpLmNvbG9zc3VzeHQuaW8lMkZpbmRleC5waHAlM0Zzb2x1dGlvbl9pZCUzRDEwMzAlMjIlM0IlMEElMEElM0MlMkZzY3JpcHQlM0U=[/vc_raw_js][/vc_column][/vc_row]